Lab 3
- Alexandra Charland
- Mar 29, 2020
- 4 min read
In this lab, I was able to model objects and recreate them in the real world through methods such as unrolling and 3D printing. I use the term 'unrolling' to describe flattening a 3D object in a way that I can put it back together using flat materials such as paper, cardboard, or wood.
I was able to finish assembling and printing all my objects for this lab before remote lessons began, and I believe I mostly achieved what I envisioned for each object.
Part A
For part A, I modeled three objects in Rhino that I could potentially unroll. The first two objects belong to the same concept of a "mini paper cubby/organizer". They were built to have a simple, cube-like, and zero curvature design for the ease of cutting and piecing together. To unroll them, I used the Rhino command 'UnrollSrf' without any further model modification.


Unrolled Surface 1: Horizontal Paper Storage Box


Unrolled Surface 2: Vertical Paper Storage Box
I modeled a rounded hat for my last object, which I unrolled in two parts. Since the hat brim had zero and single curvature, I simply used UnrollSrf without modification. The rounded hat portion had double curvature, so before I could unroll it, I needed to simplify the surface into flatter surfaces by making it into a mesh, so I first converted the surface into a mesh using the command Mesh, then turned the mesh back into a solid using MeshToNURB. This method converted the rounded surface into many flat, triangular surfaces that I could unroll.


Unrolled Surface 3: Round Hat
For these models, I left the unrolled surface pieces connected because I wasn't expecting to assemble any of them in this stage.
Part B
In part B, I chose one of these models to cut out and assemble. I decided to build the Horizontal Paper Storage Box because it contained fewer square surfaces, and thus had required the least amount of material to reproduce. I used a large sheet of 18" x 24" sketchbook paper and several sheets of 8.5" x 11" printer paper to build this model. Instead of using the connected unrolled surface, I exploded the surface into 16 separate square surfaces and added 3mm rectangular tabs around each square for the purpose of gluing all the individual surfaces together. The purpose of this approach was to be able to fit all of the box's parts on the paper that I had, which was necessary in order to fit the material into the 18" x 32" laser cutter bed.


Unrolled Horizontal Paper Storage Box exploded into 16 surfaces for the laser cutter
I have found that this zero-curvature model was an efficient choice, as it took only a few minutes to cut out and only an hour to assemble. It was also a simpler version of the vertical iteration of the Paper Storage Box, as this horizontal box could be turned on its side to become vertical. Given the limited time span that I had to model and cut this surface out before classes would move online, I was glad to have pursued it.

Assembled Horizontal Paper Storage Box
Part C
For part C, I 3D printed three objects with real-life usability. These three objects were my table scraper from the previous lab, some chopsticks, and a phone stand.
The table scraper was modeled after a real version, which was designed to be lightweight and thin in order to scrape crumbs effectively. When I printed out the model, I found that it seemed quite fragile, since it was made of thin, 0.3mm-thick plastic filament instead of metal. This meant that I would have to hold it with care and not grip it too hard to prevent it from breaking. However it worked quite well at scraping away all the leftover support filament that I removed from it.


Table Scraper
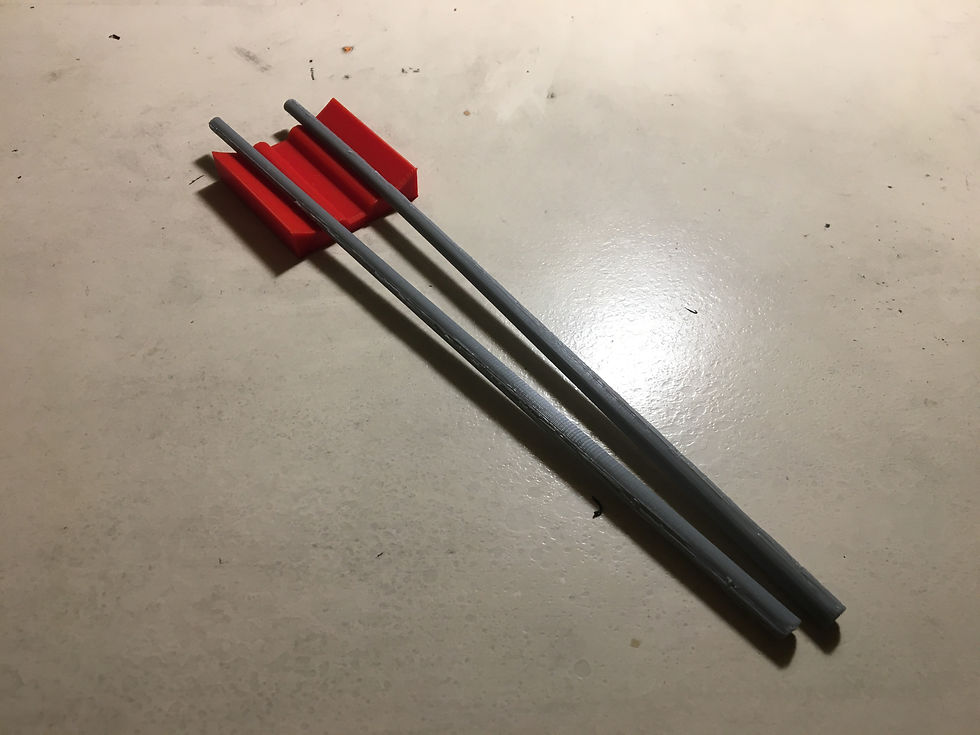
The next objects that I printed were chopsticks to go with the chopsticks/pencil holder model that I created in Lab A. The chopsticks had a 6mm diameter on one end and a 4mm diameter on the other. I was able to have the diameters transition smoothly by constructing the model using the Pipe command in Rhino. The length of the chopsticks measured 198.5mm, which is somewhat shorter than the standard 260mm chopsticks length, but I found this necessary in order to fit them nicely on the printer bed and reduce the print time. They are about the size of take-out disposable wooden chopsticks, which are 200mm in length, and are comfortably usable.


Chopsticks
The last object that I printed was a remodeled concept of the phone stand that I tried to create in Lab B. This time I was able to scale it to the exact size I wanted it to be and modeled it with a simpler design. Unfortunately it wasn't that simple to 3D print, as the printer was unable to print it correctly after a certain height above the printing bed (about 1 inch up from the bottom). I ended up having to explode the model into three flat pieces, print them separately, and glue the three pieces together in order to complete this object. It does its job of holding a phone up however, so I was satisfied with it (minus the warping on its face that occurred due to poor filament sticking earlier on)


Phone Stand


Comments